A link at the previous post dated back @ Sunday, November 20, 2005 didn't quite work properly, so i've decided to actually post the whole thing here.
Yes, the whole article is a copy & paste thing :)
Enjoy :)
This article has been submitted to FF7:AC Movie by Raven_237.
All credits goes to him for this Final Fantasy VII: Advent Children Analysis, thank you Raven_237.
Cloud Strife's 6 Piece Sword in Final Fantasy VII: Advent Children describes the mechanism behind Cloud's weapon using scene by scene screenshots to demonstrate its assembly process.
 For those of us who have seen the movie, one of the coolest and also most stupefying elements in it was Cloud Strife’s sword. It was a sword that actually comprised of 6 individual swords that could be combined to form one big one. Through the movie Cloud used this to his advantage especially during the final battle with Sephiroth. However, some are confused as to how this sword combines the 6 individual swords and more so, what the 6 individual swords are. Did Cloud use all of them during the movie? Yes he did, and I’m going to show you all of them and how they integrate into the main weapon with screenshots from the movie.
The Base Sword (first sword)
The base sword is the most complicated of all the other swords so I’m going to be spending the most time talking about it. It’s the only sword (outside the 2 switch blade swords) with moving parts. The base sword has 5 stages to it and each stage is defined by how opened or closed the blade is.
The first stage is the one in which the blade and the hand guard are closed. Below is a screenshots of the sword in the first stage. Notice in the first screenshot that the hand guard is closed and diamond shaped. In the second and third stages the hand guard opens up via these pivot points (marked in red) and becomes rectangle in shape. More on this later. In the second screenshot, though it’s not very clear you can see the blade (green) and the hand guard (red) are closed. This stage is the mainly to allow the sword be carried easily in the sheath, as seen in the first screenshot:

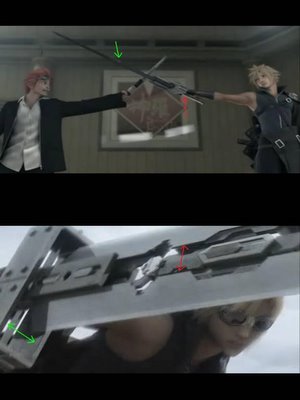
The second stage of the sword is what I like to call the battle ready stage. In this form the sword’s blade (red) and the hand guard (green) are fully extended. Cloud tends to use this form the most in battles:
In 2nd screenshot the pivot point for the hand guard can be seen very well (red). Do you also see the little piece of metal on the inside (yellow)?

It can be seen a little more clearly here (yellow). Those are what hold the hand guard to the blade. Also it’s the main mechanism that allows the hand guard to expand:

I’ll try to explain here to the best of my ability with the diagram below how the hand guard thing works. Basically, the piece of the handle that the metal pieces connect to has a spring-loaded rotation ability. When Cloud sees fit he can activate it and it will rotation and push the metal pieces out which in turn forced the pivots on the hand guard to move outward as well and form the rectangle hand guard. With the rectangle hand guard the sword can now fit the other 5 swords in the assembly.

I’ll explain the 3rd and 4th stage of the base sword later on in the guide.
The Impact sword (the second sword)
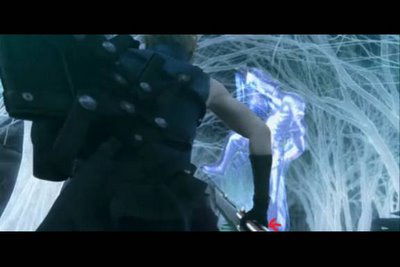
I call this sword the impact sword because in the assembly is becomes the main impact blade. The sword itself is hollow and can be seen below (red):

Even the handle is split (red), which allows the blade to wrap comfortably around the first blade:
Now for the assembly. Here are the swords before assembly. Notice the gap in hand guard of the first sword (red) and the fact that the sword is expanded (green):

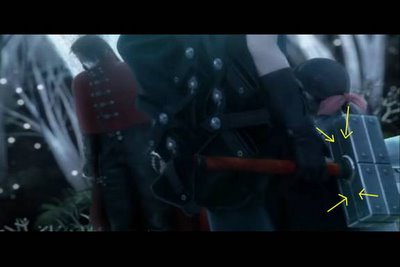
Now the 2 swords are together. The gap has closed and the first sword has contracted and the second sword is fitting snuggly in its position (yellow):
 Last but not least, the second sword is slid down to lock in place (yellow). Notice that the 2nd blade does not connect to the center of the base sword but in fact to the right section of the blade (from Cloud’s point of view). Now the base sword is in its 3rd stage which I call the Phase 1 assembly stage in which the blade is closed, the hand guard is expanded and the gap at the base of the hand guard is closed:

Now the gap at the base of the hand guard is filled by 4 metal plates that fold out from inside the hand guard itself. One can slightly be seen here (yellow). It is noticeable due to the fact that it is a slightly different color from the actual inside of the hand guard:
When all four are down it looks like this. Notice the dividing points that indicate that there are in fact 4 (yellow):

The 3rd and 4th Swords (have no good name for them)
The 3rd and 4th swords are identical. In the assembly they occupy the same place except on opposite sides. Below is a screenshot of the 3rd and 4th blades before being assembled (red). If you look to the right you’ll see the first 2 swords already in the assembly (yellow):

Now for the 4th stage of the base sword. The base sword needs to be in this stage in order for the 3rd and 4th swords to be assembled. In this stage (Phase 2 assembly) the base sword’s blade is slightly expanded (red) and the hand guard remains as it was in the 3rd stage. Now why does the base sword need to be slightly expanded at this point? Well, you cannot lock the door till you’ve closed it. More on this analogy later.

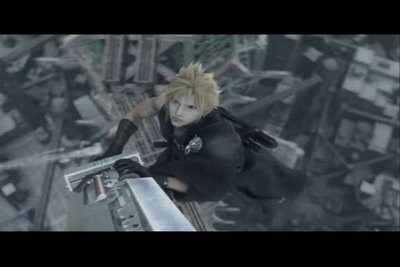
Getting a good picture of the 3rd sword after assembly is only as hard as getting a picture of the actual assembly because it happens so fast and in the middle of the Bahamut battle. If you look closely below you will see the 3rd sword connected on the left side of the assembly to the top. The blade of the 3rd sword itself is facing down (green) the blunt end is facing up (red) and the handle is locked into the base of the hand guard (yellow): Here is a screenshot of the 4th sword just before being assembled (red). This happens as Cloud’s friends are boosting him up the sky to hit Bahamut the final blow.

This is the 4th sword as it is being assembled on the right side of the main sword (red). It’s as clear as day here:

And here is Cloud snapping the 4th sword into the locked position. Notice that the base blade is still in the 4th stage:
 Now that the first 4 swords are assembled the base sword can be put into the 5th and final stage (Phase 3 assembly). In this phase the base blade is complete closed, so in essence it’s the same as the 3rd phase. Now what this closing of the base blade does is 1.) It locks the impact sword and the 3rd and 4th blades together (red) and 2.) Now permits the 2 switch blades to be placed in the assembly:

Here you can see that the blade for the impact and the 3rd and 4th swords connect seamlessly. This also points out more accurately how the tips for the 3rd and 4th swords are shaped:
To be continued...


No comments:
Post a Comment